We’ll start by creating a new workspace. A workspace is the largest grouping, think of it as a common theme. So in this case, we’ll call it “EnergyDataDK”
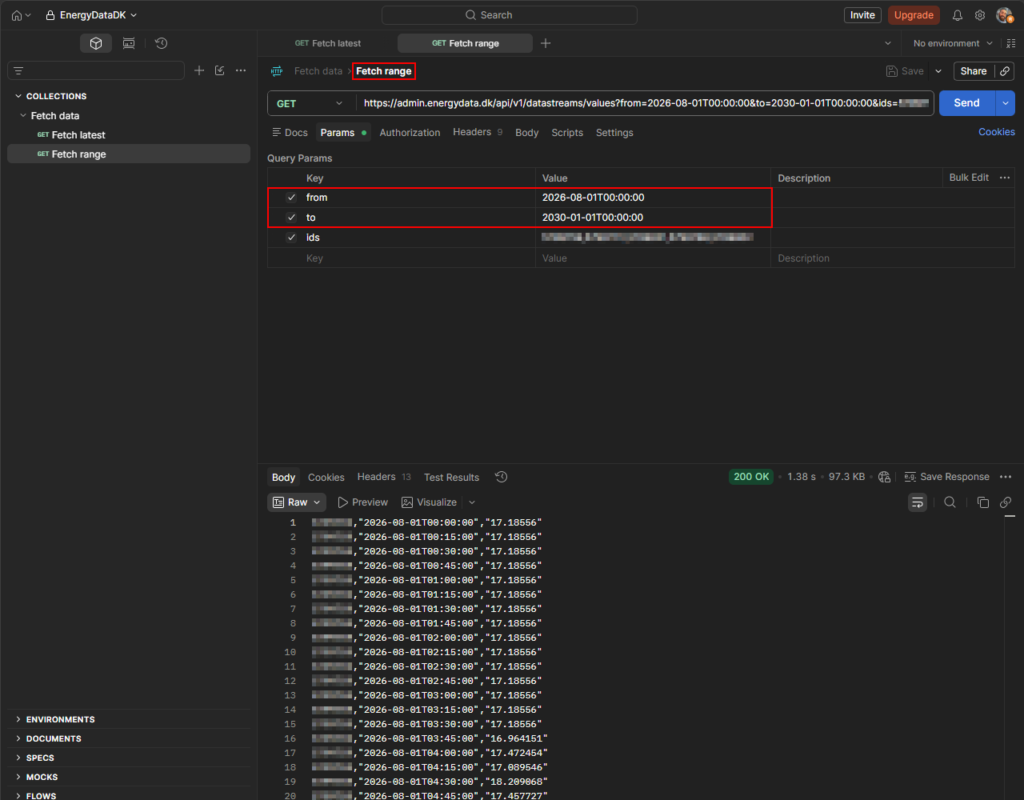
Selecting the Workspaces option in the menu on the left of the screen.
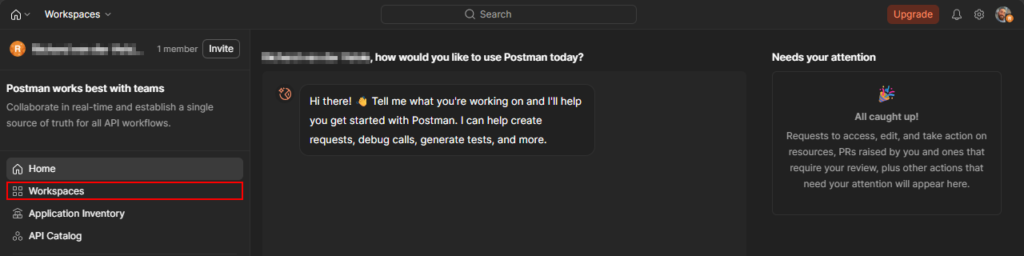
On the Workspaces screen, press the Create workspace button.
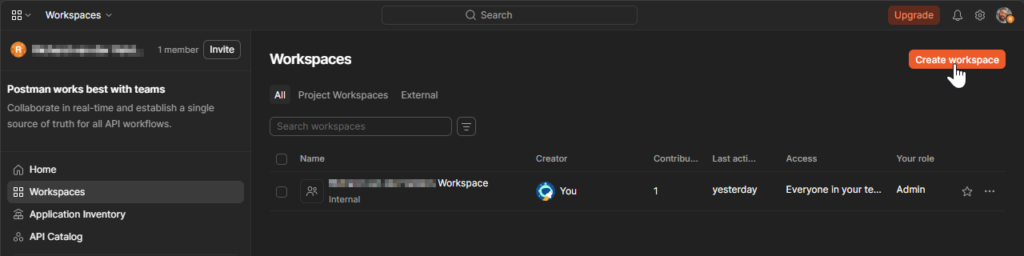
Name your new workspace under Workspace name. for example “EnergyDataDK.
Select Internal under Select workspace type , and select Only you and invited people Under Who can Access.
These settings ensure that you maintain control over who can access your workspace and the information stored within it.
Finish by pressing the Create Workspace button.
A collection is a grouping of requests that share some commonality. In this case that will be fetching data using the EnergyDataDK API, so we will name it something like “Fetch data”.
In your collection, press the Create button.
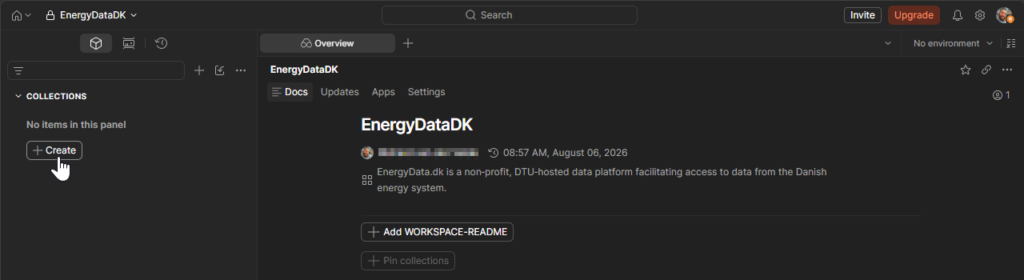
We want to all requests in this collection to use the same API token. So first we’ll add the token to a variable.
Select the Variables tab, enter “API token” under Variable and enter your API key under Value.
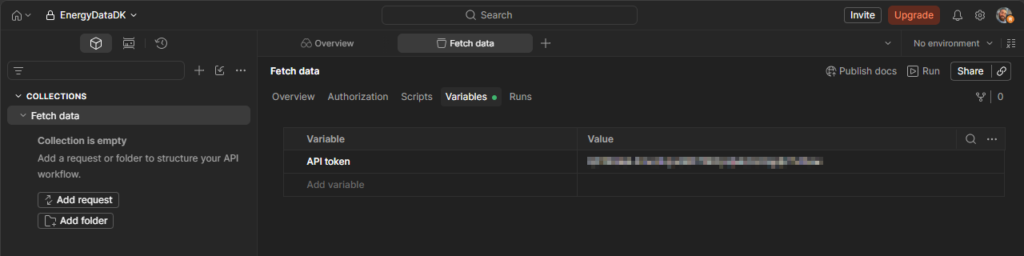
Switch to the Authorization tab.
Select “Bearer Token” under Auth Type 1, and enter “{{API token}}” under Token 2. This references to the variable you’ve just created.
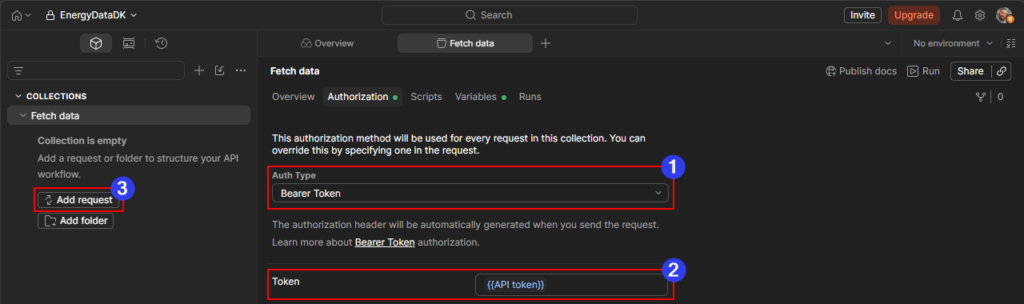
Now we can start adding requests.
Add a request by pressing the Add request button 3 on the left side of the screen.
This first request will be used to see the latest values in the datastream(s). This is useful if you want to see if there’s any data in the datastream at all, and/or to see when the latest data was added. This is particularly useful if you’re experimenting with uploading data to EnergyDataDK, and want to quickly check if you’ve been successful.
Name the new request “Fetch latest”.
Ensure the method is set to GET (default) and enter the the following URL in the URL field 1: “https://admin.energydata.dk/api/v1/datastreams/values”.
Select the Headers tab 2, select “Accept” under Key and enter “application/json” under Value 3.
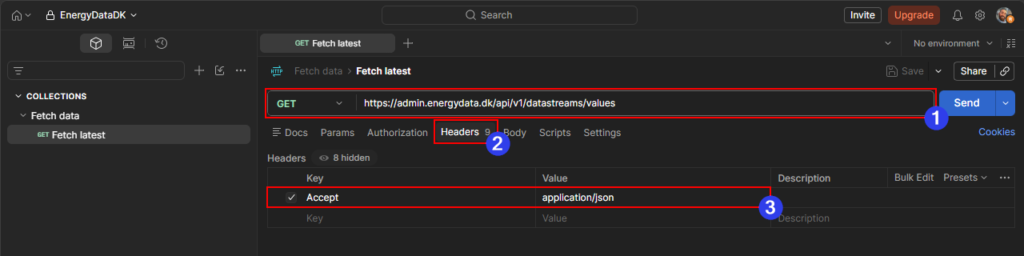
Switch to the Params tab.
Add “latest” under Key and “true” under Value.
Add “ids” under Key and add the ID(s) of the datastream(s) you want to see the latest entry of. Separate your IDs with commas and without spaces. For example: “1234,2341,3412”.
Press the Save button to save your changes and finally press the Send button. You should now see a green “200 OK”.
If there is any data in your datastream you will see it at the bottom of the screen.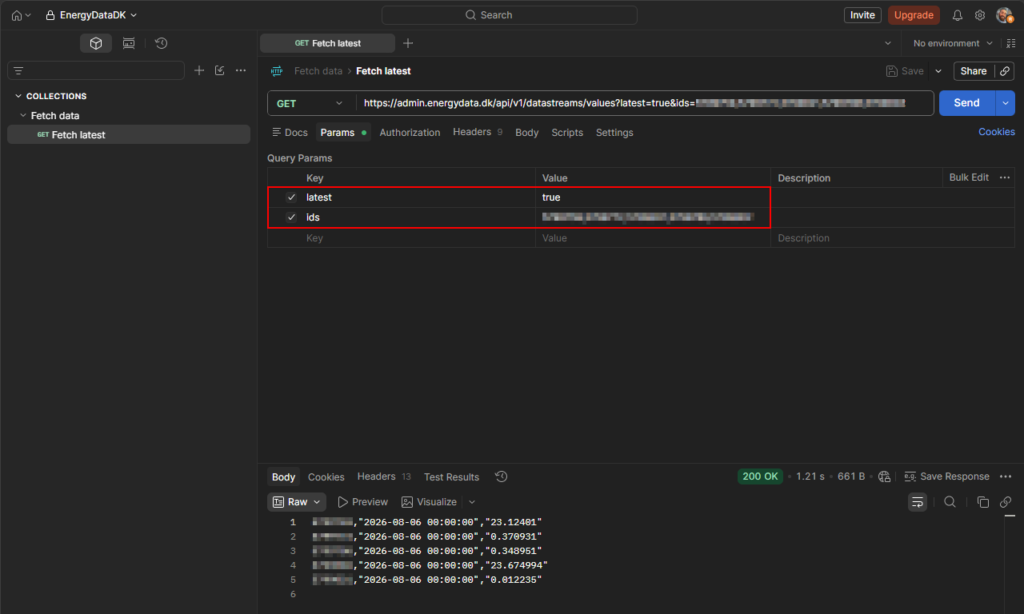
If you don’t merely want the latest values, but instead want all data from a specific period, we can make a duplicate of this request and make a few small modifications.
Press the icon next the the request we created previously and select Duplicate.
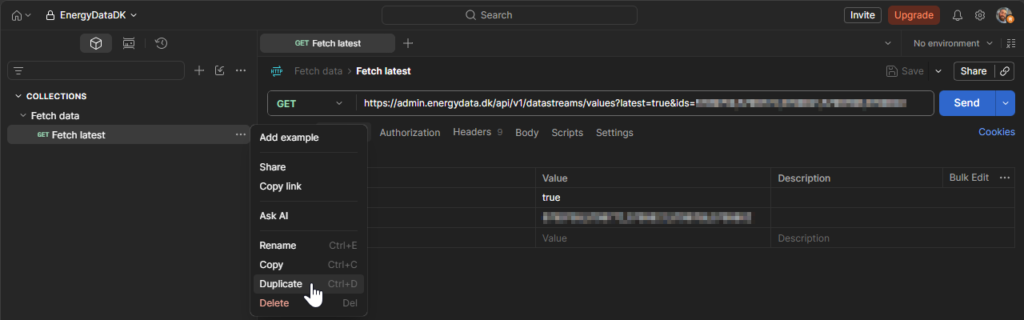
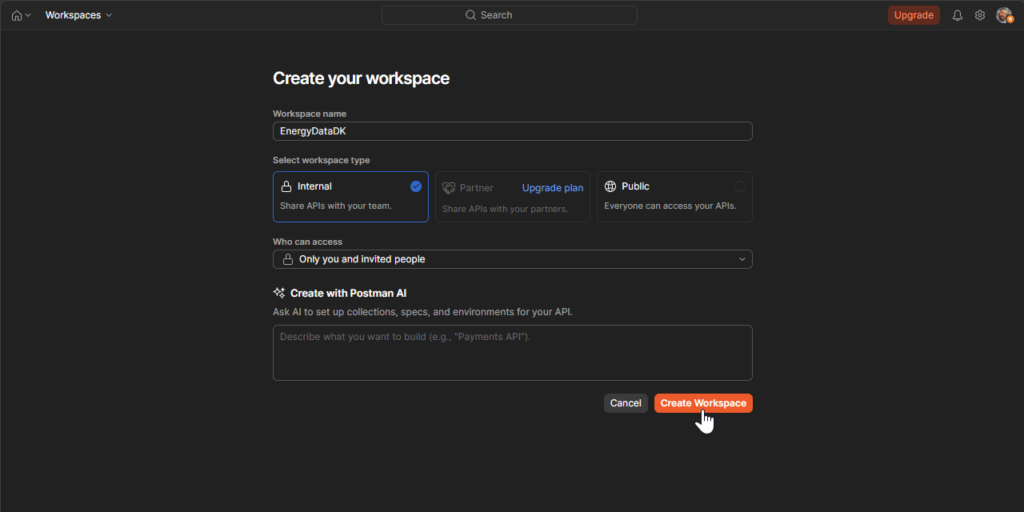
Rename the request “Fetch range”.
Replace the “latest” key with “from” and replace “true” with the starting date of the range.
This needs to follow the following format: YYYY-MM-DDThh:mm:ss, for example “2026-08-01T00:00:00”.
Add a new key “to” and add the end date as its corresponding value.
Press the Save button to save your changes and finally press the Send button.
You should now see a green “200 OK” and the data from the specified period.